
Learn how to use a Chopify connector to add CardCorp payments to Shopify
Connect Shopify to your CardCorp payment gateway with Chopify.
Chopify store settings
- The settings you configure for your Shopify Checkout do not apply to the Chopify Checkout.
- Always select the Live theme so your checkout will collect payments correctly
- Chopify will always charge the customer in the store currency
Prerequisites
- Request your CardCorp payment gateway authentication credentials (
Entity IDandAccess Token) from the CardCorp Support Team. CardCorp provides separate entity IDs and access tokens for the test and live environments. - Use the Shopify Basic plan or higher for your store.
Create a custom app in Shopify
Create a custom app in Shopify for the Chopify connector.
-
Sign in to Shopify at https://admin.shopify.com/.
-
In the left sidebar, near the bottom of the page, select Settings.
-
Select Apps, then Develop apps.
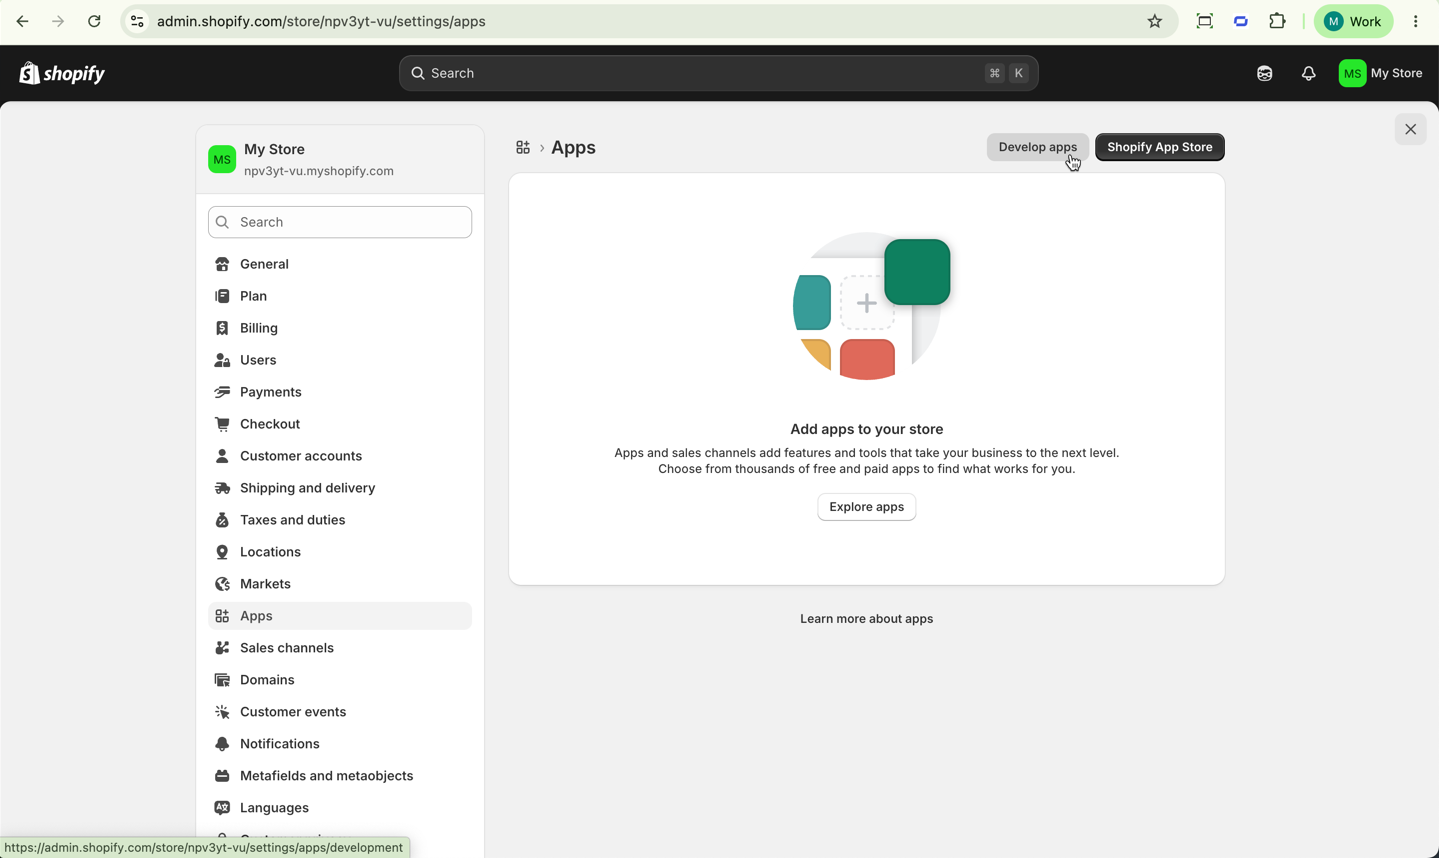
-
Select Build Apps in Dev Dashboard.
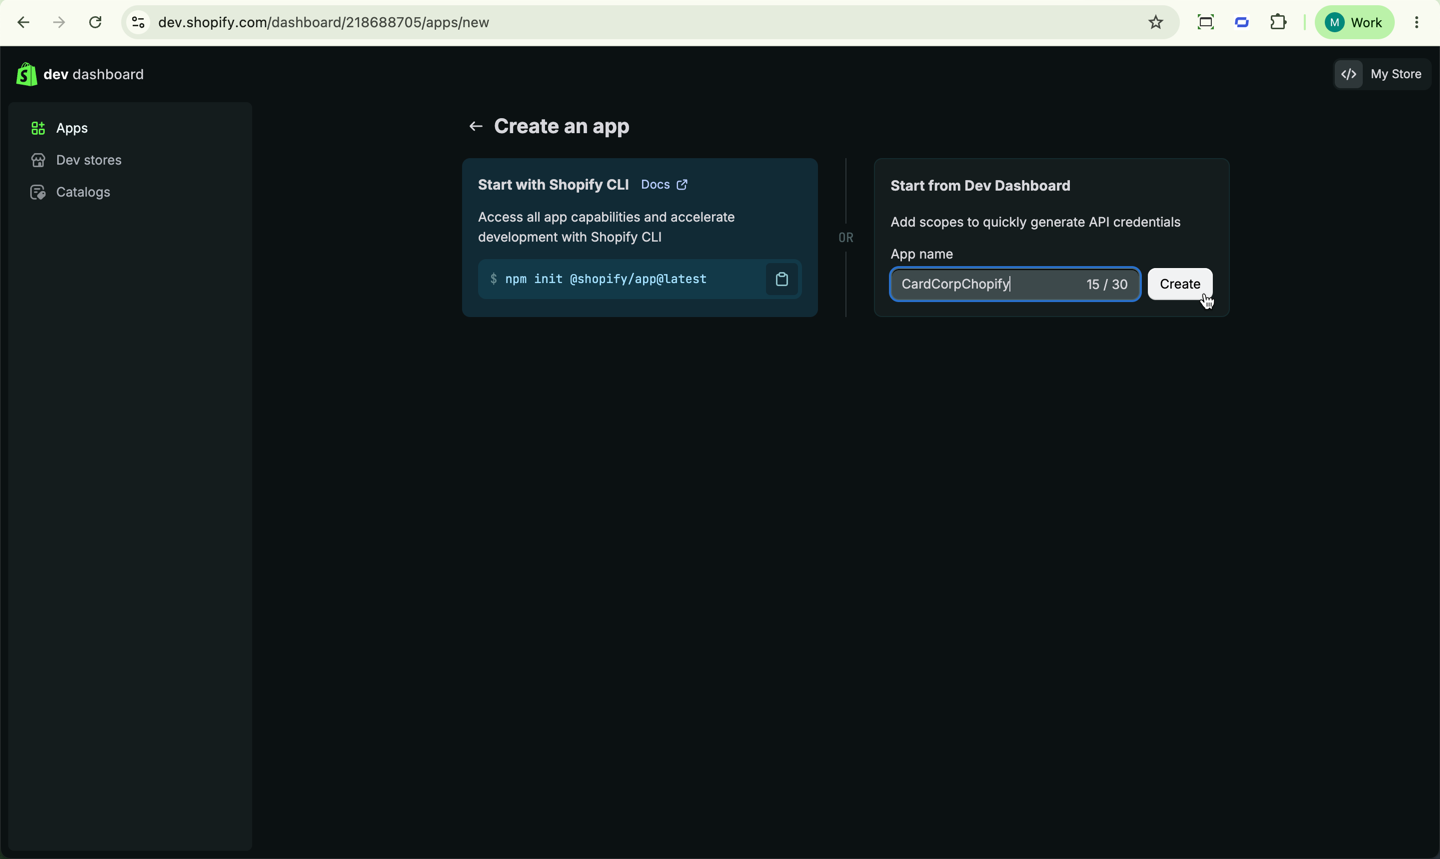
-
Select Create app.
-
Under Start from Dev Dashboard, enter the App name, then select Create.
-
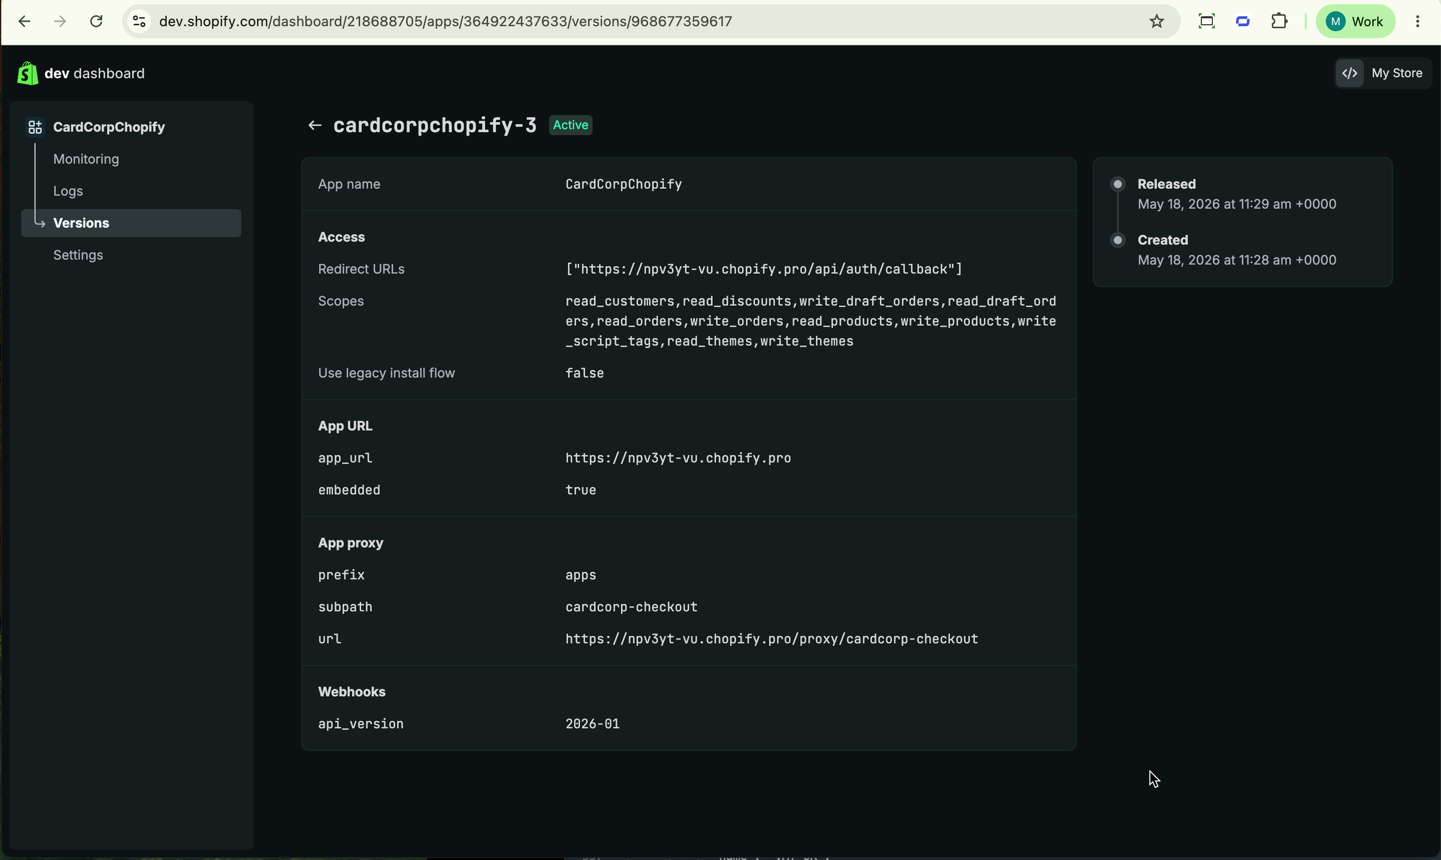
For the App URL, enter
https://[subdomain].chopify.proand replace[subdomain]with your store subdomain, for example,https://npv3yt-vu.chopify.pro. -
For the Webhooks API version, select
2026-01.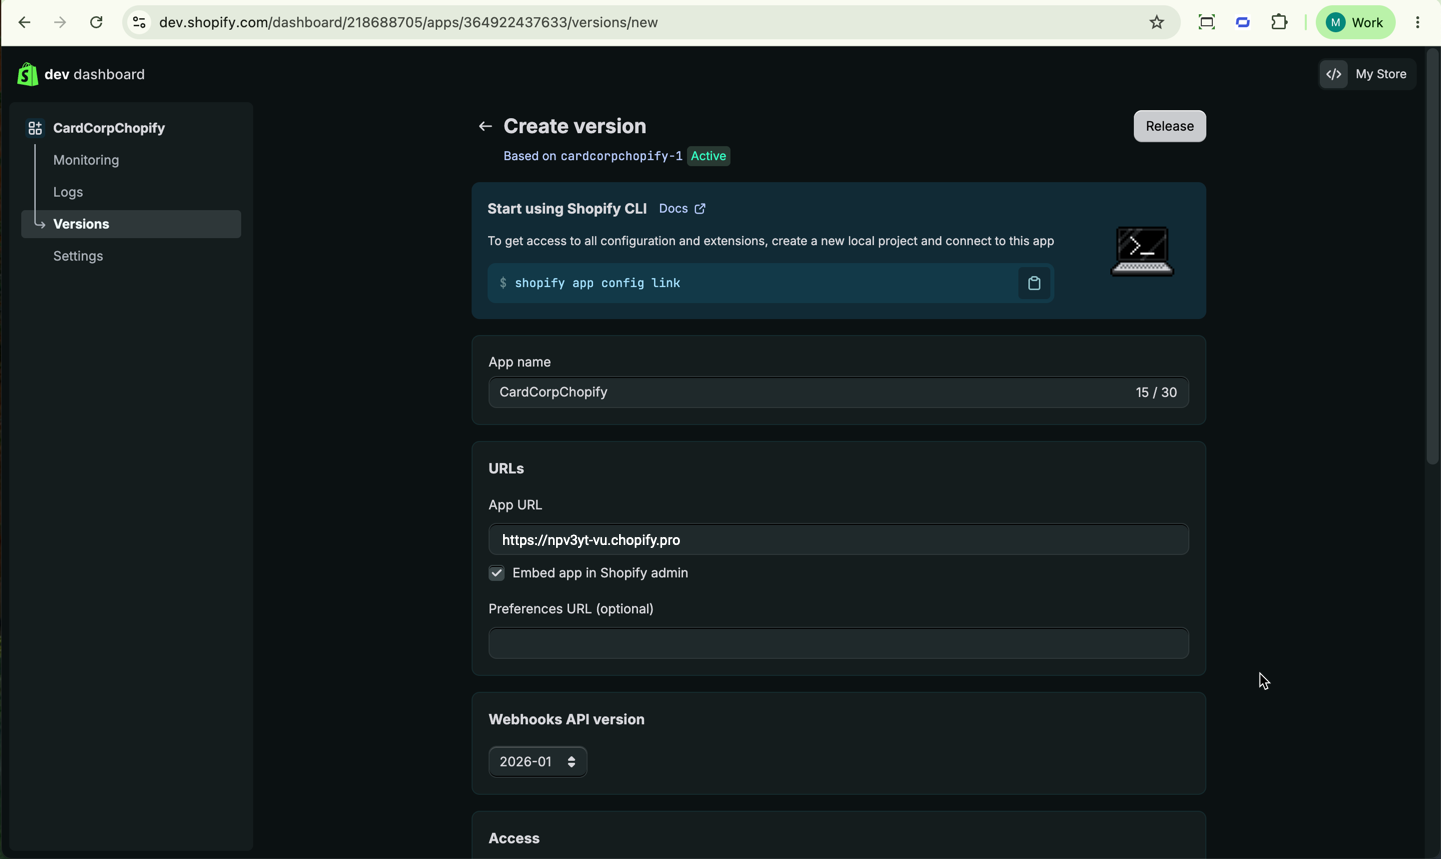
-
For the Scopes, paste these values.
read_customers,read_discounts,write_draft_orders,read_draft_orders,read_orders,write_orders,read_products,write_products,write_script_tags,read_themes,write_themes -
For the Redirect URLs, enter
https://[subdomain].chopify.pro/api/auth/callbackand replace[subdomain]with your store subdomain, for example,https://npv3yt-vu.chopify.pro/api/auth/callback. -
Under App proxy, for the Subpath prefix fro
apps, enter the Subpath ofcardcorp-checkout. -
Set the Proxy URL to
https://[subdomain].chopify.pro/proxy/cardcorp-checkoutand replace[subdomain]with your store subdomain.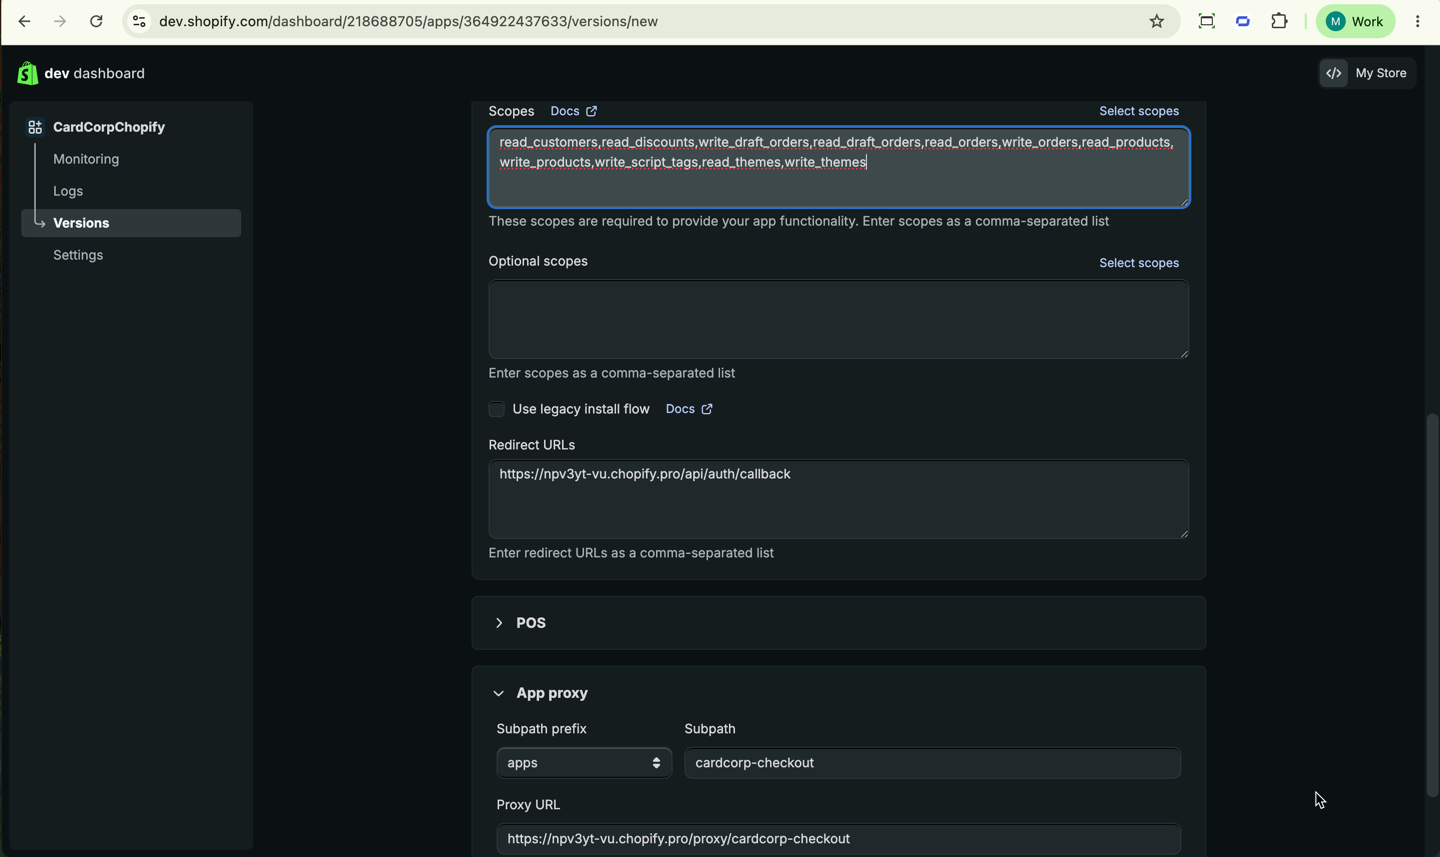
-
Select Release, then confirm your app details for this version.
Get the app credentials
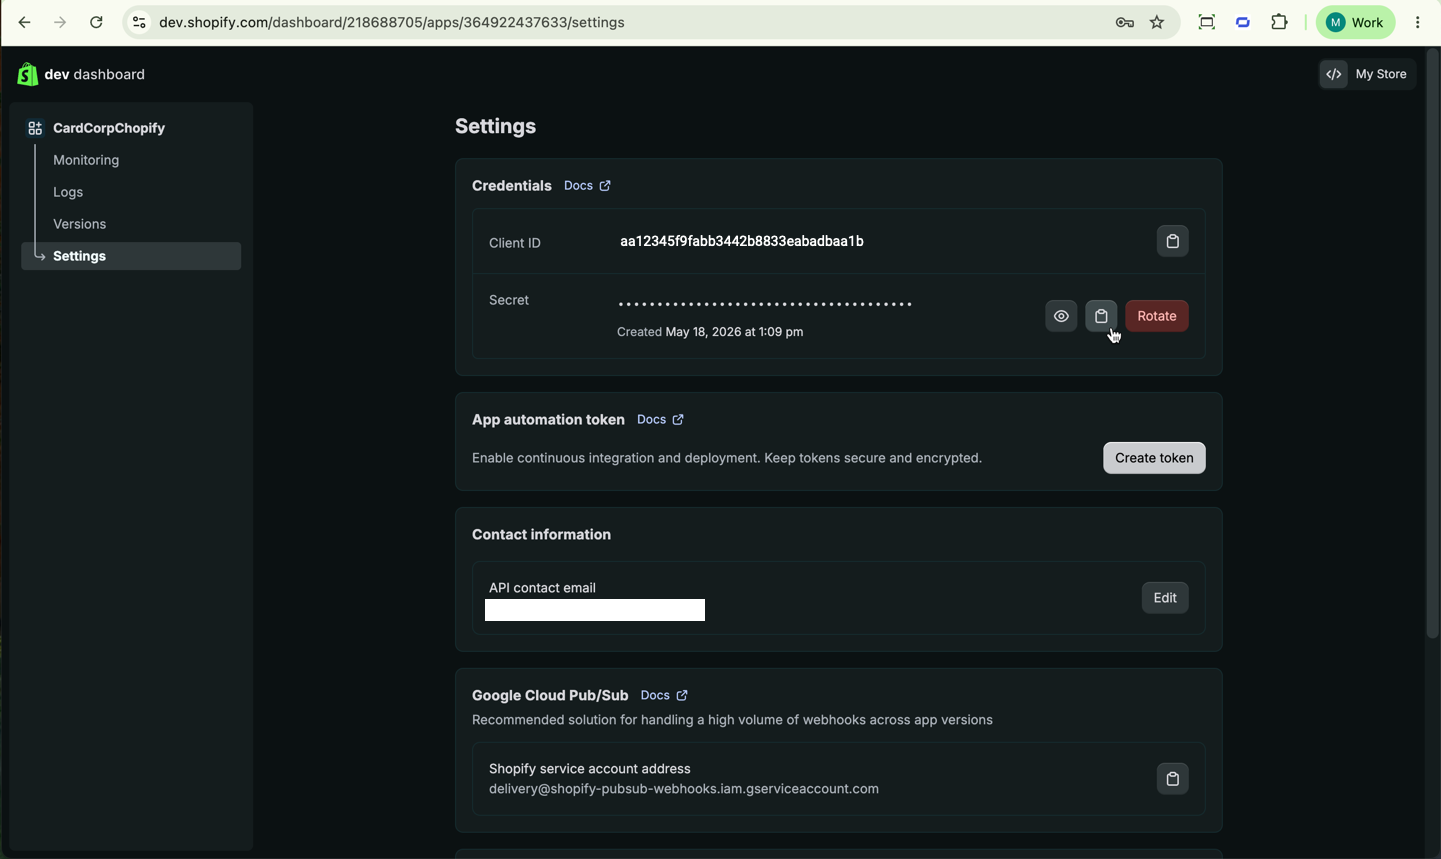
- In Settings, copy the Client ID and Secret. Send these credentials to CardCorp Merchant Services.
Install the app
-
From Settings, select the app name in the left menu.
-
Select Install app.
Or from outside the app settings, go to Settings > Apps. Select Develop apps, then select Build Apps in Dev Dashboard, and then select the app name and install.
CardCorp Merchant Services creates your connection
CardCorp Merchant Services registers your app credentials on the server before you configure the Chopify app. Confirm that registration is complete before you continue.
Configure the Chopify app for the test environment
Configure the Chopify app with your test credentials before you deploy it to your live store.
-
In Shopify Admin, go to Apps.
-
Select your app name, then select Settings.
-
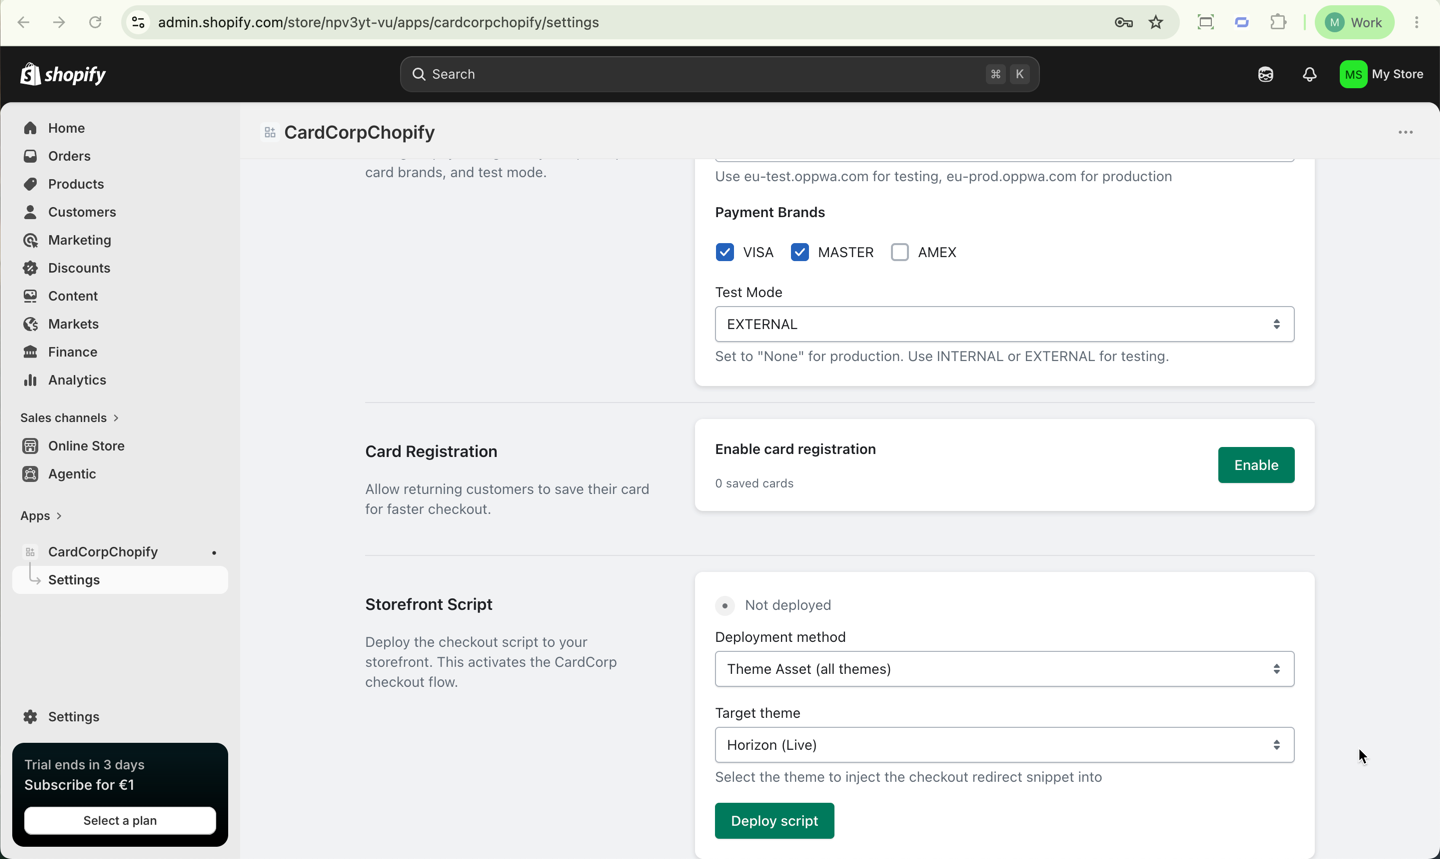
Enter your Entity ID and Access Token for your test environment.
-
Clear the
AMEXbrand because that requires a separate connector in the gateway. -
For Test Mode, select
EXTERNAL.
-
Optional: If your store has a user area where customers can sign in, select Enable card registration to let your customers save cards.
-
For Deployment method, select
Theme Asset, then select your Target theme, which is yourLivetheme. -
In the top right corner, select Save.
-
Select Test connection and confirm that your credentials work. If the test fails, contact CardCorp Merchant Services to check they have registered your app credentials before you continue.
-
When your connection test passes, at the bottom of the page, select Deploy script.
Go live from your test environment
To switch to your live environment from your test environment, change the following settings.
- Enter your Entity ID and Access Token for the live environment.
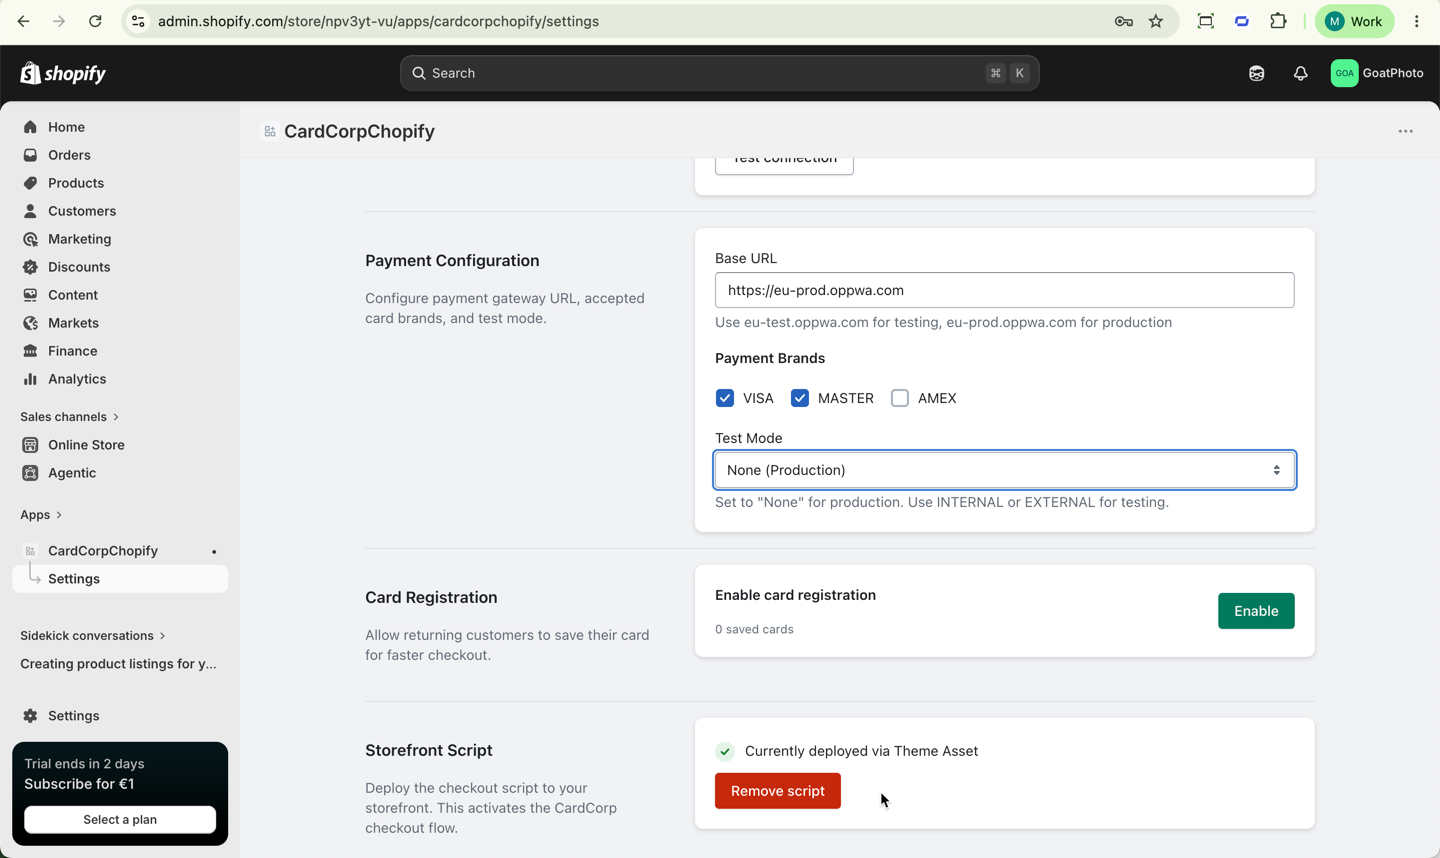
- Change the Base URL to
https://eu-prod.oppwa.comfor the live environment withprodinstead oftest. - For Test Mode, select
None (Production). - Select Save at the top of the page.
- Select Test connection.
Configure the Chopify app for the live environment
To deploy directly in the live environment, configure the app with your live credentials to accept payments from your customers.
- Go to Shopify Admin.
- Select your app name, then click Settings.
- Enter your Entity ID and Access Token for the live environment.
- Enter the Base URL to
https://eu-prod.oppwa.comfor the live environment. - For Test Mode, select
None (Production). - Select Save at the top of the page.
- Select Test connection and confirm that your credentials work. If the test fails, contact CardCorp Merchant Services to check they have registered your app credentials before you continue.
- Select
Deploy script.
Delivery
Chopify supports delivery to the customer's shipping address only. Selecting additional delivery methods does not make them available to the customer.
Taxes
Chopify supports Shopify tax, Shopify basic tax, and manual tax. Include all taxes in the product price.
Refunds
Refund transactions from the CardCorp Hub with the following steps.
- Sign in to the CardCorp Hub.
- Follow the instructions at Refund a transaction.
Update your app
To make changes to your configuration, follow these steps.
- Go to Versions
- Select Create version
- Edit the Settings.
- Select Release, then confirm your app details for this version.