
Add Apple Pay and Google Pay to your checkout
Apple Pay and Google Pay transactions are credit card transactions in which card information is tokenised and encrypted by Apple or Google Payment Tokens.
Apple Pay
Before you begin:
- To prepare to accept Apple Pay as a payment method, create an Apple Developer account.
When your Apple Developer account is live, do these steps.
-
Get a Certificate Signing Request (CSR) file from CardCorp. Tell your Account Manager that you want to accept Apple Pay as a payment option during checkout and ask CardCorp to generate 2 CSR files for you.
Use the CSR files supplied by CardCorp to generate certificates under your Merchant ID and Domain. -
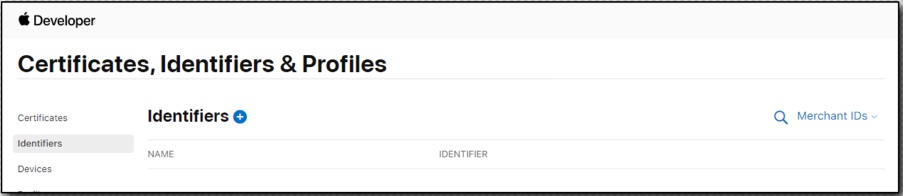
Create a Merchant ID. In the Apple Developer App go to Certificates, Identifiers & Profiles and create a Merchant ID.
-
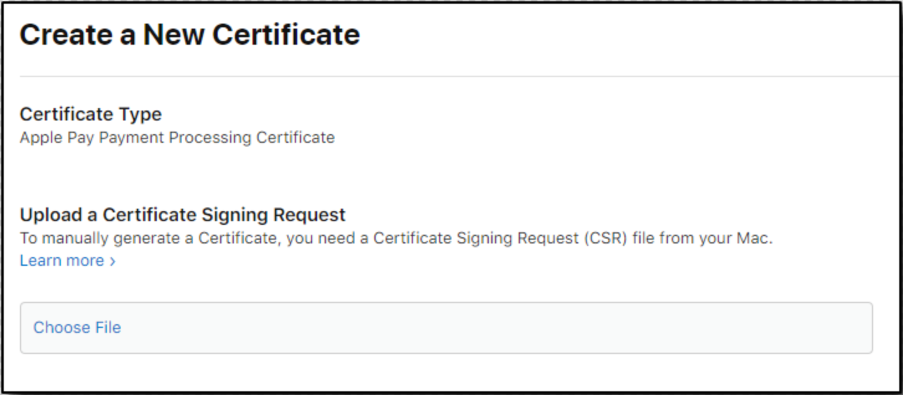
Generate an Apple Pay Payment Processing Certificate.
Select the Merchant ID you created, and choose Create Certificate.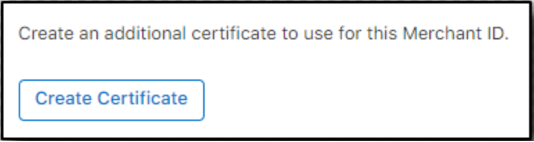
Upload the CSR File "Payment Processing".
Download the Certificate and provide it to CardCorp.

-
Add Domain in your Apple Developer App.
In the Merchant ID section, look for the Apple Pay on the Web section.
Click Add Domain and follow the steps required by Apple.
-
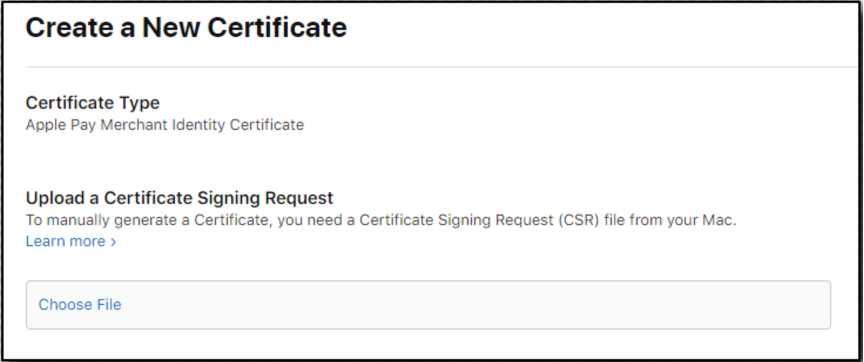
Generate Apple Pay Merchant Identity Certificate.
In the Apple Pay on the Web section, go to the Merchant Identity Certificates and click Create Certificate.
Upload the CSR file for "Merchant Identity".
Download the Certificate and send it to CardCorp.

-
Add Apple Pay as your Payment Brand in your Integration Script
-
For COPY and PAY Integration, create the checkout as usual.
-
To create the payment form, add the following lines of HTML/JavaScript to your page and populate the following variables.
- The
checkoutIdthat you received in your response in Step 1.
<script src="https://eu-test.oppwa.com/v1/paymentWidgets.js?checkoutId={checkoutId}"></script>- The
shopperResultUrl, a page on your site where the customer should be redirected after the payment is processed, and the card brands will be available.
<form action="{shopperResultUrl}" class="paymentWidgets" data-brands="APPLEPAY VISA MASTER"></form> - The
-
-
For Server-to-Server Integration, there are 2 APIs for Apple Pay.
-
Apple Pay with an encrypted payment token
You can send the encrypted payment token as is. The gateway will decrypt it and process the transaction.
Send the following parameters together with other parameters in a SERVER-TO-SERVER request.
paymentBrand=APPLEPAY
applePay.paymentToken={ ... }
For the value of
applePay.paymentTokenuse the JSON (payment token) received from Apple.Note that the payment token expires after two minutes. Be sure to submit the payment token immediately after it is generated. Transactions with expired payment tokens are rejected to prevent a replay attack.
-
Apple Pay with decrypted card information
You can do the decryption yourself and send the decrypted card information with the usual card API:
card.number,card.expiryMonth,card.expiryYear,threeDSecure.verificationId,threeDSecure.eci, andapplePay.source(Possible values:weborapp).For example:
paymentBrand=APPLEPAY
card.number=4200000000000000
card.expiryMonth=05
card.expiryYear=2022
threeDSecure.verificationId=ABiKYvXjhcB7AAc+K04XAoABFA==
threeDSecure.eci=07
applePay.source=app
NOTE: Be sure to renew the certificate before it expires. Simply create a new certificate by following the same steps above.
-
-
Google Pay
Google Pay allows customers to make secure payments with any stored credit or debit card in their Google App.
- Get the gatewayMerchantID from CardCorp.
Tell your Account Manager that you want to activate Google Pay and acquire your gatewayMerchantID - Add Google Pay as your Payment Brand in your Integration Script. This will depend on what integration option you use.
- For COPY AND PAY.
Configure the Google Pay object in thewpwlOptionsin generating the Payment Form.var wpwlOptions = { googlePay: { gatewayMerchantId: "" merchantId: "" } } - For Server-to-Server, there are two APIs for Google Pay:
- Google Pay with the encrypted payment token.
You can send the encrypted payment token as is. Our gateway will handle the decryption and process the transaction.
Send the following parameters together with other parameters in a server-to-server call:
ReplacepaymentBrand=GOOGLEPAY googlePay.paymentToken={ ... }googlePay.paymentTokenwith the JSON (payment token) received from the Google Pay API. - Google Pay with decrypted card information.
You can do the decryption yourself and send the decrypted card information with the usual card API:card.number,card.expiryMonth,card.expiryYear,threeDSecure.verificationId,threeDSecure.eci, andgooglePay.source(Possible values:weborapp).
For examplepaymentBrand=GOOGLEPAY card.number=4200000000000000 card.expiryMonth=05 card.expiryYear=2022 threeDSecure.verificationId=ABiKYvXjhcB7AAc+K04XAoABFA== threeDSecure.eci=07 googlePay.source=web
- Google Pay with the encrypted payment token.
- For COPY AND PAY.
And that's it - you're done!
Questions?
Sign up on our website and talk to the CardCorp customer service team for assistance.